|
Objective: Make the mundane enticing... brokeassstuart.com/blog/2016/04/05/10-most-legendary-beds-of-all-time/ Photograph a piece of furniture or object of interest in your house. This can be in color or black and white. Sit in an area and observe the lines and shapes of the piece. Create a format around your observed area and look for textures, gradations, wood grain or interesting shapes and make a detailed study. Photograph objects/furniture so they look as desirable as they possibly can. The objects you choose do not have to be new or even appealing. The way you photograph them should make them look special. An old blanket lit by a shaft of late afternoon sunlight, would be considered desirable. Chose furniture or household decorative objects that have some character. Suggest a setting, but keep it simple. An ordinary object can look extraordinary of you photograph it with some imagination. An interesting angle of view, limited depth of field, and a strong source of light can make just about anything look good. Study good advertising and check out some of Ms. Del Rossi’s Elle Décor magazines for ideas. If you want to try having a model in your “advertisement”, give it a whirl. Artist's to look at: Steven Steigman - Blown Away Man, Niki Feijen Techniques: Point of view, limited depth of field, strong light source 
0 Comments
Objective: Play with light and vantage point Using clear glasses and bottles of different sizes and shapes, create a new vantage point or “lens” with water. Shoot some in black and white, and some with colored water. Shoot up close for detail or expansive, so a small microcosmic world may be in your photo. If you get bored, try adding elements in your water to make your world come to life. Maybe create some bubbles with ginger ale? You may place messages in your bottles. Include lots of detail and only show a small area instead of the whole glass. If it is a bottle, find an area that shows off the reflections and surface quality of the bottle. http://www.widewalls.ch/still-life-photography/ Photographers: Josef Sudek, Melvin Sokolsky, Laurens Kaldeway Technique: Reflection and set up designing 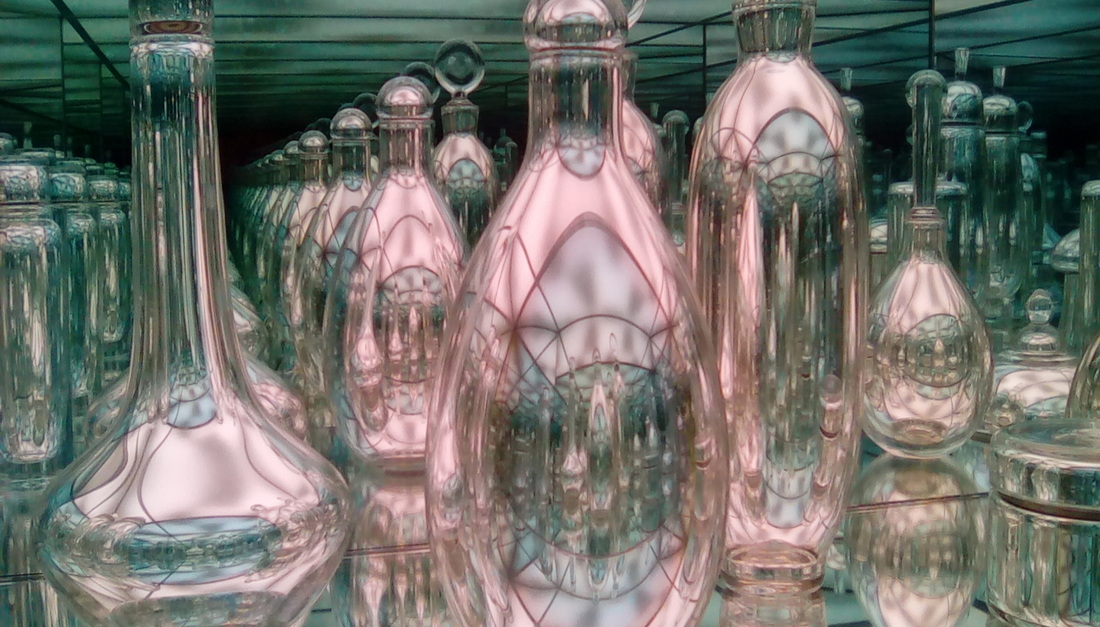 Objective: To see others in a new way. Catch the playful side of adults, or show their innocence. Focus on the subject of adults who normally have some control over you (parent, teacher, boss, coach, etc.) The emphasis should be for you to gain some control over them through the portrait process. A good portrait is often a struggle for control between the photographer and subject, with each wanting to gain control over the final image. Try and tell us something about the person you are photographing by controlling the way the shoot is done. 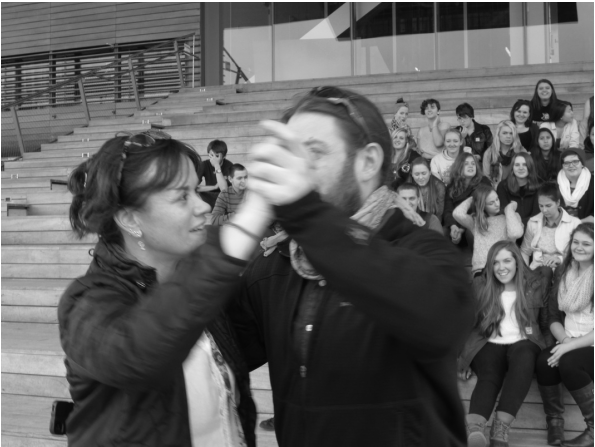 Objective: Integrate Arts Elements using Black and White photography This is a study concerned primarily with design, without much regard to subject. Your images want to be almost abstract. A viewer shouldn’t easily recognize what you’ve photographed. Shapes, tones, and textures are important. Tight framing, unusual views, selective focus, and bold lighting will help improve the design of your images. Photographers to study: Minor White, Man Ray, Aaron Siskind 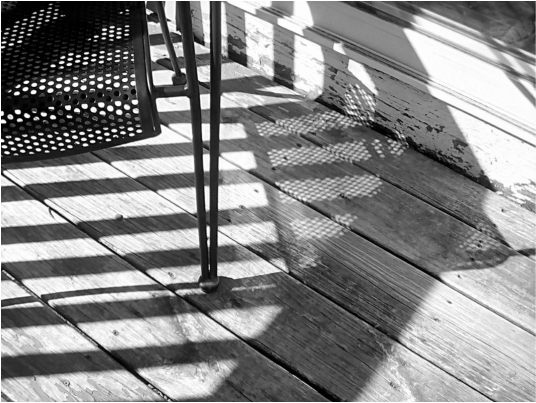  Lesson Resource: The Art of Eduction
Objective: Experiment with digital photography and editing software Go outside to observe fall colors and practice taking shots. Brainstorm a list of interesting subject matter related to fall. Look a variety of photos. Write on the left reflection side of your notebook a few simple ways to make photographs more interesting. Examples include using the rule of thirds and taking a photo from an interesting angle. Experiment with different camera settings and write down what worked for you. If the weather is bad on any of the days, you can also set up a still life with fall-themed items in the art room. There is a bin with Fall related items in the art room. Review photos as they take them. If photos don’t turn out, delete them so you have more memory. Keep in mind you need 3 final photos for your book. Edit Photos and Print Upload photos to the computer. Try using Picassa to edit. As an option, you may add text and turn these into fall greeting cards. Print the photos. If making cards, cut out photos and attach them to the front of the blank cards. Artists: Edward Weston (peppers) Technique: Digital Editing, Rule of Thirds Lesson From The Art of Education Objective: You will use the elements and principles of design to evoke a feeling and tell a full story in a single photograph. On your left page write about how the artist you research might have worked: starting with the idea for the narrative, then staging the photograph? Or, starting with the image elements? Talk about how much of the story is possible to tell in one frame. Brainstorm classic story genres or themes. Ideation: Begin to think about a narratives. Identify characters, setting, and conflict. As your narratives develop, identify which elements and/or principals can be used to help reinforce story elements. Based on their ideation work, create a few composition sketches to get them thinking about the actual images. Take a number of photographs.Take at least 10-20 photographs. From these, select the three that best tell the story using design principles. Critique with a partner to identify 3 images to make a series that tells important story elements. You may use photo editing software to enhance their images. Using various props and costumes is optional. Artists: Sandy Skoglund and Jennifer Zwick. Technique: Staging, Narrative photography   Lesson from the Art of Education
Objective: You will create light effects with digital cameras set to slow shutter speeds, practice the concept of positive and negative space, and learn how to easily manipulate photos to make stencils to create cool light graffiti images using glow sticks and digital cameras! This project merges technology with stencils and the concept of positive and negative space into one fun and effective lesson. You will learn how to easily manipulate photos to make stencils to create cool light graffiti images using glow sticks and digital cameras! Materials • PhotoShop (or other photo manipulation software) • Digital cameras & Tripods • LCD projectors • tag board • x-acto knifes or scissors & cutting boards • pencils or markers • thick glow sticks. The first step is to create a reference by manipulating a photograph in Photoshop or other photo manipulation software. To avoid copyright issues, use your own photograph. We want to convert our image into positive/negative space. In Photoshop, this is easily accomplished by selecting Image/Adjustments/Threshold. The next step is to transfer your image from the computer screen to a piece of tagboard or poster board. The easiest method is to tape the tagboard to whiteboard the board and project the image using an LCD projector. Shade in the area to be cut out, to help differentiate between areas. Cutting can take a long time. Use an X-Acto knife or very sharp small scissors. With the lights off and windows covered, set up a digital camera on a tripod with an open aperture and 10 second shutter speed. Work in teams of at least three. One student holds up the stencil, one student is in charge of taking the photo and the other students run the glow sticks behind the stencil. Take many photos of the same stencil. It might take several times to get the best shot. On the right page have a print of your favorite image. One the left page write your research and method. Artists: Street Artists like Swoon, Banksy, and Shepard Fairey. Photographers: Gjon Mili, Man Ray http://lightpaintingphotography.com/light-painting-history/ Techniques: Painting with light, photoshop techniques, positive/negative relationships  www.instantshift.com/2010/08/24/88-brilliant-examples-of-forced-perspective-photography/
Lesson From the Art of Education Objective: Use forced perspective to create optical illusion photographs. Look at some exciting examples of forced perspective photography. On the left page of your sketchbook discuss how the effects were accomplished and what images you enjoy. Think about how the images you like could be changed or modified to work in the school setting with available materials. You may work outside the building, but avoid Student parking areas and areas that border the school campus. Often takes many shots and readjustments to get all the elements lined up to accomplish the desired effect. You may have volunteer model form another class to assist, but do not work in more than groups of three to four. Each group must have at least one cell phone with a camera and Internet access.Think of strategies for creating effective compositions using forced perspective. Brainstorm effects you want to create and places around the school that would make good settings. Artists: There are many images for this type of playful photography. Check out Jerry Uelsmann for surrealistic pre photoshop work. Techniques: Forced perspective, framing www.thisiscolossal.com/2014/05/fantastic-fungi-steve-axford/ Objective: Set the Stage. Think about how composition is a key secret to making great art. How composition can make even boring objects look interesting?. You will be challenged to prove that even objects like paperclips and rubber bands can become interesting when arranged well. Make a list of compositional strategies to try as you view and discuss the work with a partner. Talk about filling the picture plane, establishing a focal point, the Rule of Thirds and creating variety. Also think about lighting and try different filters. Consider everyday objects and work together to set up some image references. Come up with four pictures of the objects with strong compositions. Edit as you go. Remember that it often takes multiple tries to get a winning shot. Share their top four photos by printing out thumbnails and pasting them to your right page. On your left page explain how you selected work to share. What composition did you find the strongest from each group of four? Artists: Look at work that showcases strong composition, like work by Steve Axford. Technique: Composition, Close up.  |
 RSS Feed
